
Updated Aug 29, 2024
- SG Widget (Recommended)
- Manual Add
- CSV Upload
- API Integration
- Facebook(Meta) Integration
There are several ways to Sendgrid Email Capture such as CSV Upload, manually adding from the dashboard, through API requests and of course with the SG Widget opt in form.
Each approach has its positives and negatives. As creators of the best Sendgrid subscription widget on the market, we've experimented with all of them so can provide expert insight to help you make the right decision on How to do Sendgrid Email Collection for your website.
Contents
 The Best Sendgrid Email Capture Method - SG Widget
 1) SG Widget (Recommended)
The ultimate method of collecting emails for your Sendgrid account is by using SG Widget - the best Sendgrid Subscription Widget available. Enter your email into the form below to see just how seamless the experience is:
Use case: Adding a Sendgrid signup form to a website (with double opt-in) without writing code.
- 100% Automated email collection
- Simple and fast setup
- Welcome email delivered instantly
- No maintenance - set and forget
- No technical knowledge required - copy and paste snippet
- Double Opt-in
- Collect extra data fields
- Works on any website
- Rich user experience
- None
It’s extremely simple to set up - add a Sendgrid API token into your SG Widget account, create a widget and paste the generated snippet onto your website. It doesn't matter what platform your website is built on. It can be static HTML, a shopping cart like Shopify or any CMS like Wordpress and still get Sendgrid email collection out of the box.
Everything else will be handled automatically including front end validation, Double opt-in, welcome emails and ongoing maintenance. There is no code to be written and the widget can be tweaked with a variety of config options in the SG Widget dashboard.
A standout feature of SG Widget is Double opt-in, which is essential for any website that wants to comply with GDPR. Users will receive a preliminary email to verify that they own the email address they are trying to sign up with before being added to a list. This prevents misspelt emails from being entered and increases your open rates because users will actively go to their inbox seeking the email.
The ingestion is instant so you can immediately trigger welcome emails or automation campaigns that fire the first email out to new contacts while they are interacting with your service, which further increases the likelihood of emails being opened. From that point onwards you can send marketing emails to contacts in your list with custom email templates and be confident that new emails are automatically added over time.
All of the other methods mentioned in this article will allow you to collect emails for your Sendgrid account but with trade-offs. SG Widget has none.
2) Manual Add
This is perhaps the easiest method if you want to add a couple of email addresses quickly. Just log into your Sendgrid account, select a contact list and type an email address.
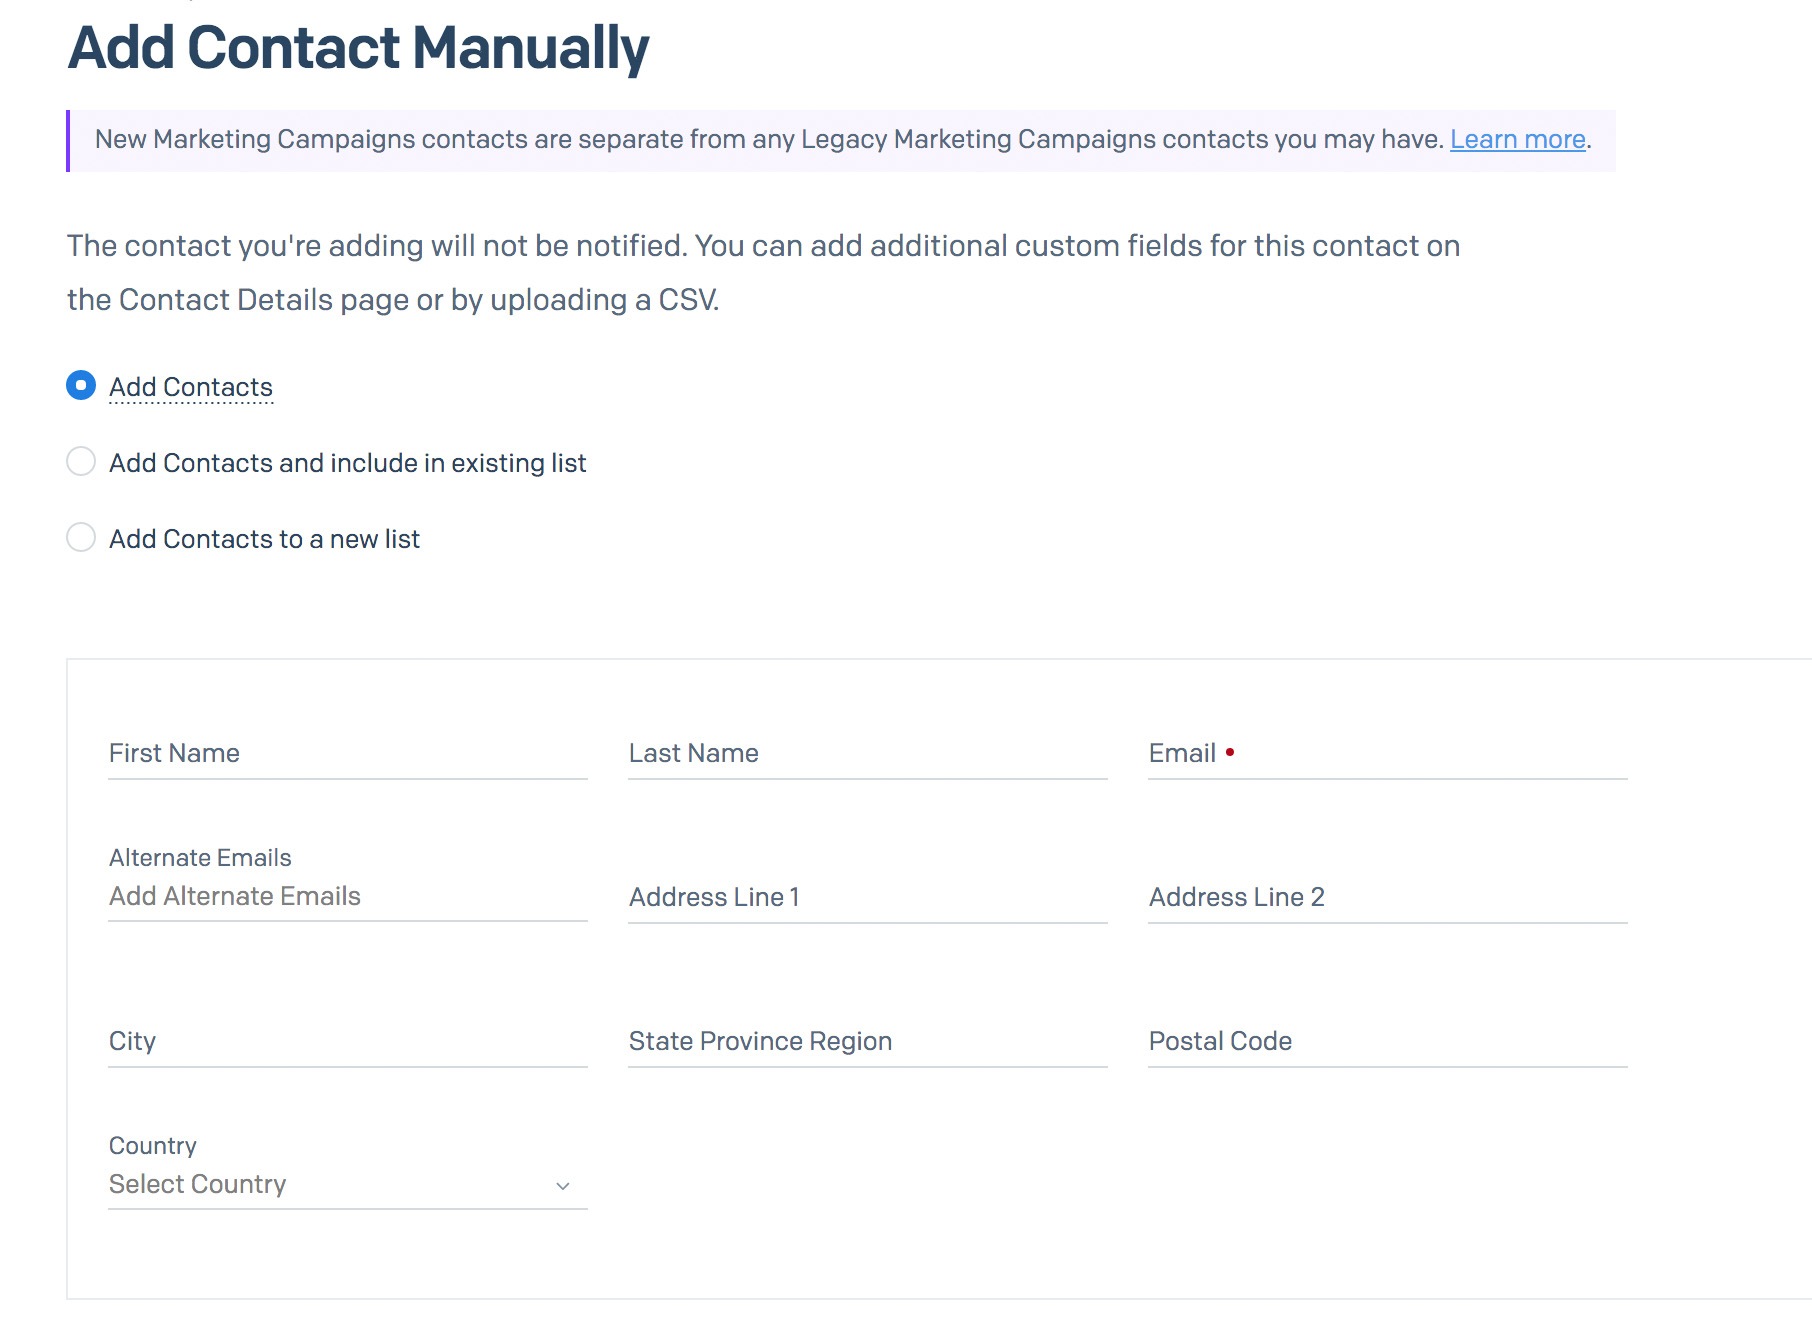
Use case: Entering an email address that you can type from memory
- Easy
- Time-consuming to add one by one
- Emails still have to be captured somewhere else
- Not scalable
- No double opt-in
- Not triggered by the owner of the email address
- Contact isn’t notified
- No custom data points other than the default fields
We use this method immediately after creating a new contact list in Sendgrid to add an email address(usually our own) that increments the count by 1 and ensures everything works as expected.
Unfortunately, the benefits end there. If you have any sort of scale or want to add to your list regularly, this method won’t work. Emails still have to be gathered in another location and then pasted into Sendgrid. If you are doing that, you are better suited to using the CSV upload method discussed next.
3) CSV Upload
CSV Upload offers more efficiency than manually entering as it allows batches of emails to be added at once. We use this technique when migrating a list of emails to Sendgrid for the first time such as a user database from a Wordpress site that we want to put into Sendgrid or migrating a list from another tool like Mailchimp.
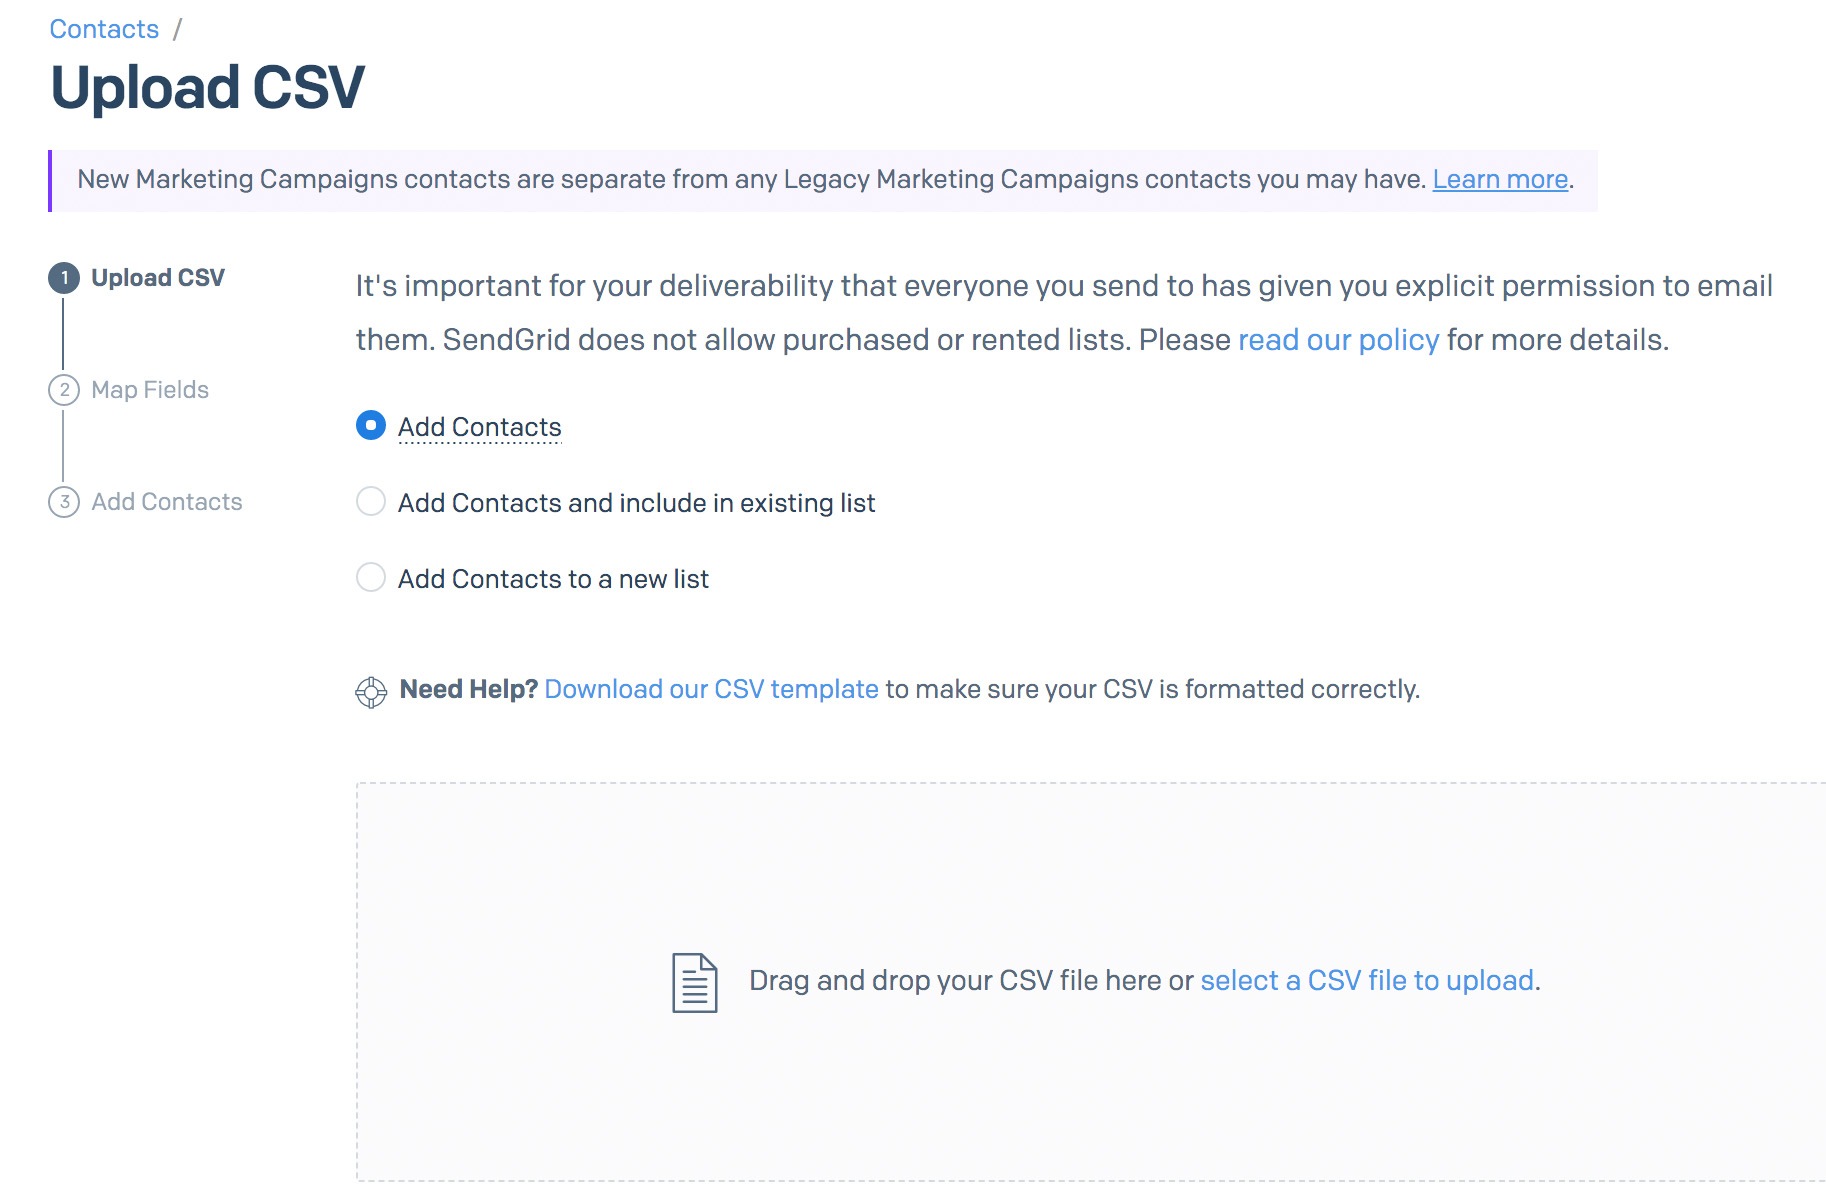
Use case: Uploading a batch of emails that have been collected in another system.
- Easy
- Manual process
- Emails still have to be collected somewhere else
- Not scalable
- No double opt-in
- Not triggered by the owner of the email address
- Contact isn’t notified
Unfortunately, there are still many negatives because it’s not an automated process and the effort to capture the emails in another location before adding to Sendgrid still has to be carried out. It's important to note that everyone you send email to needs to have given you explicit permission to do so. When uploading a batch of emails with CSV, the onus is on you to ensure that every persion listed has actually verified they are ok with being contacted.
CSV uploads also require every item to be formatted correctly. One misplaced comma or character encoding error can break the entire upload. In a list of 100 this is easy to find but in a list of 1,000,000 locating the breaking character can be a challenge.
4) API Integration
Using the Sendgrid API to collect emails is a scalable method because once the code is written and the integration is complete, you have no further work to do. As long as the capture is working correctly, emails will flow from your app into Sendgrid automatically. The Sendgrid API is robust so you can send any level of traffic to it without worrying about performance or cost.
Use case: Automatically adding someone to a list when they sign up to your website or app
- Automated
- Can be real time while user is interacting website
- Scalable
- No Double opt-in
- Requires programming knowledge
- Requires development time
- Contact isn’t notified
We used this method in the past to automatically add someone to a Sendgrid list when they created an account in another application.
While there are benefits, the trade-off is that programming knowledge is required and time will need to be spent writing the code. The API doesn’t provide Double opt-in functionality or Welcome emails out of the box so you will need to write logic to handle that on your side.
You can read more in the Sendgrid API documentation
5) Facebook(Meta) Integration
Capturing emails for your Sendgrid account via Facebook(yes we still call it Facebook) is easy with the help of zapier. If you are running a campaign this zap will send every new contact to your Sendgrid list.
Use case: Running a paid social campaign on facebook
- Automated
- No code solution
- Scalable
- No Double opt-in
- Spend on facebook ad needed
- Dependency on zapier
- Contact isn’t notified
It's not possible to drop SG Widget into a facebook ad so this is a good alternative that we have used in the past.
Conclusion
Sendgrid is a powerful tool for sending emails but you have to get email addresses into the contact lists first. There are a few methods to achieve this depending on your use case.
Manually adding, CSV upload and API integration have their benefits and shouldn't be discarded but the most powerful by a distance is SGWidget. It has no downsides and is incredibly simple to use.
Use SG Widget to started with Sendgrid Email Capture today.
Jessica 08.21.2024
The meta zapier integration is genius. Does that pass through your widget?
SG Widget Support 08.21.2024
No that zapier method is totally standalone and can be done without an SG Widget account. We are happy to share all techniques for email capture even if it doesn't benefit us directly.